This blog is the continuation of Ansible with DellEMC storage multi-part blog.
In the last (5th part) of this blog series, we discussed how to install Ansible AWX / Tower in a docker container and Dell EMC Ansible modules inside the Ansible AWX / Tower container.
In this blog post, we will create a new credential type for Dell EMC storage systems and then add storage credentials in Ansible AWX / Tower.
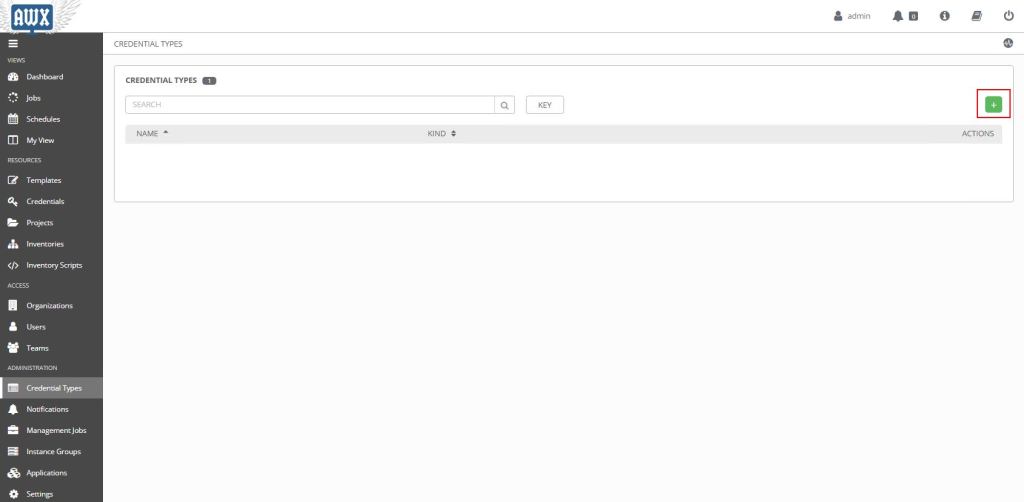
So first let’s get started with creating a Credential type for Dell EMC storage array. Login to your Ansible AWX / Tower console. In the navigation pane (on left) click on “Credential Types”. Then click on the green “+” icon on the right to add a new credential type.
In the “New Credential Type” creation page enter below details and then click on Save
- Name – Dell EMC Storage (User Friendly Name)
- Description – Optional Description
- Input Configuration – Copy and Paste below text
fields:
  - id: target
    type: string
    label: Array IP address
  - id: username
    type: string
    label: Array username
  - id: password
    type: string
    label: Array password
    secret: true
required:
  - target
  - username
- password- Injector Configuration – Copy and Paste below text
extra_vars:
  password: '{{ password }}'
  target: '{{ target }}'
  username: '{{ username }}'

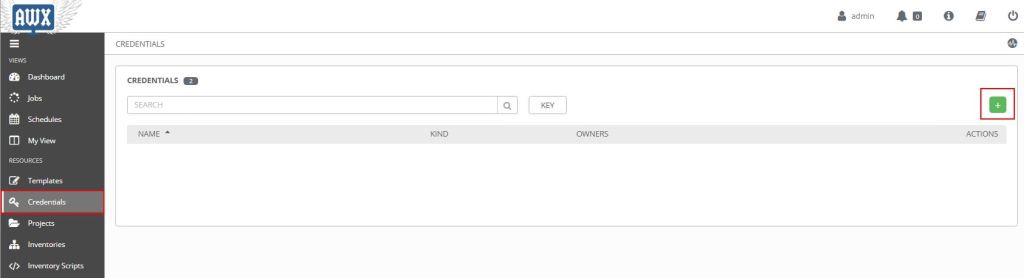
Once Credential type is created, click on the “Credentials” in AWX / Tower navigation pane. Then click green “+” button on right to create new Credential.
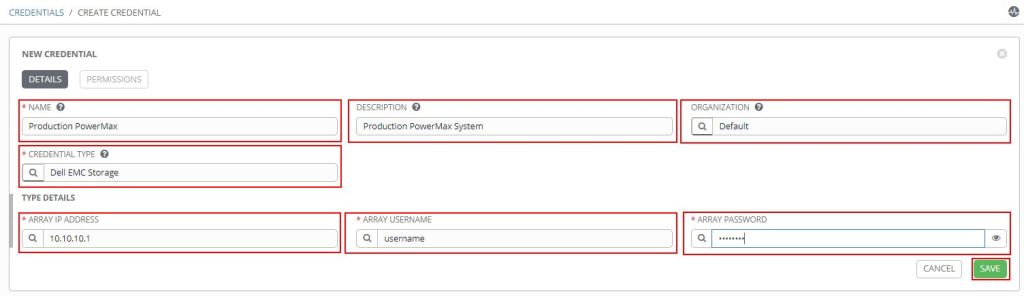
In the “New Credentials” page enter below details.
- Name – User Friendly Name to identify the storage array. In this example “Production PowerMax”
- Description – Optional description
- Organization – You can choose appropriate Organization as per your configuration. Note that Organization can help you to mask these credentials to few users. I have selected Default in my example
- Credential Type – Choose “Dell EMC Storage”. This is the credential type we have created in earlier step. Credential type which we create earlier will be available on last few pages of the pop-up list. Alternatively you can search the same with “Dell EMC Storage”
- Type Details
- Array IP Address – Enter the management IP address of storage array
- Array Username – Username (I suggest creating separate user for automation)
- Array Password – Password for the entered username
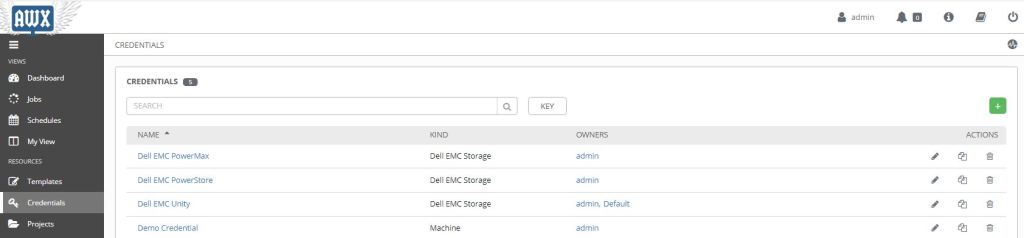
As per your environment you can create multiple credentials, each for one array.
Once credentials are created you can now go ahead and create new Ansible AWX / Tower Templates using storage credentials we just created. In the playbook you can mention storage array credentials as variables (username and password). Using these variables you don’t have to mention array credentials as plain text in the playbooks.
Additionally, you can add other infrastructure / application credentials using the same process.
I hope this helps everyone. In next post I will take you through creating new Project and Template.


1 reply »