In this article we will explore how to create incidents in ServiceNow using the REST API. This article was a stepping stone for this video that shows how to integrate ServiceNow, Microsoft Teams and alerts from infrastructure. You might also be interested in the second post in this series: ServiceNow CMDB REST API tutorial
The very first thing to do when working with a REST API is to get your hands on the reference guide and hopefully the getting started guide if there is one. The first thing to look for is how to authenticate with the API and whether there are any requirements for special headers or things like that. Afterwards things tend to flow faster and easier. Fortunately, ServiceNow supports basic authentication so there is no learning curve there, although it does support more secure authentication through OAuth if you need it
In terms of documentation the online help is great. Here you can get an overview of the API. And this is the starting point for the online REST API reference. There are many branches or child API’s hanging of this root. In the screenshot below you can see how, for every call, the online help shows the URL (default or for a specific version) and parameters (path, query and request body). Further down it shows headers for the request and the response and even two coding examples for curl and python … as complete as it gets

But the tool you will learn to love very quickly is the “REST API Explorer”. Please note that this is a tool that you can only access from within your instance. Once you log in go to “System Web Services” and then locate “REST API Explorer” as shown here

You will then end up with a menu like this. Notice how you can select the specific child API in the top-left corner and the version of your environment.

ServiceNow stores all data in tables. This is also true for Incidents which unsurprisingly are stored in the “incident” table. To manipulate tables we need to use the Table API. Different HTTP methods will enable us to do the various CRUD operations. For example if we want to create an incident we will have to use the POST method. Notice in the previous image how I have selected the “Table API” and within that API the “Create a record (POST)” call. Then on the right I have selected the “incident” table.
When you scroll down you can see a dialog that allows you to build the request body for the incident creation. With the drop-down menu you can select from all the available fields. As you select new fields and assign values, the REST API Explorer builds the body for you in the text box immediately below. At the very bottom you can generate code in multiple languages

We have grouped the API calls we are using in this article into a Postman collection. You can download the collection from the following the following GitHub repo :
https://github.com/cermegno/postman-servicenow
The collection uses 2 variables that you must add to an environment. If you are new to Postman environments check out this older article:
{{pwd}}. This is the password for the “admin” user of your ServiceNow instance. If you need to use a different user, you can change it in the collection settings{{instance}}. This is your ServiceNow instance name, i.e. excluding the “.service-now.com” suffix. If you don’t have one or you cannot test this with your production instance, you can open your very own developer instance with ServiceNow
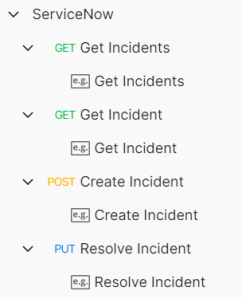
The collection provides 4 calls and a saved example for each call:
- Get details for all incidents. This will produce a 98 line JSON structure for each incident
- Get details for a single incident. This requires you to pass the “sys_id” of the incident as part of the URL as shown below. You can get the “sys_id” for a specific incident from the body of the response during the creation (POST) operation

- Create incident (POST). The JSON Body parameter can take “a lot” of fields but you can start small. For example the following Body produces the incident below:


- Modify incident (PUT). This will allow you to make changes to incidents. In particular you can use it to resolve/close incidents by setting the state to “7” as shown in the screenshot below. This call also requires you to pass the “sys_id” of the incident you are modifying as part of the URL

In this article we have used the REST API to interact with ServiceNow because this is the way I will do it in the upcoming video demo. But depending on what you are trying to do you might want to use Ansible. In that case you can use the official Ansible modules provided by ServiceNow themselves. The collection is available in Ansible Galaxy and provides just two modules designed to interact with ServiceNow tables. Follow the instructions in the Ansible Galaxy page to install the dependencies including the “pysnow” Python library
As a next step you can visit the second post in this series: ServiceNow CMDB REST API tutorial
We hope you find this article helpful. Let us know your thoughts in the comment section.

Leave a comment