I have been using HammerDB for database performance bench-marking . This is very useful tool if you’re getting into any proof of concepts (POC) or testing of new database infrastructure stack before production roll-out.
In this blog post we will discuss around using HammerDB to generate OLTP (TPC-C workload) on Microsoft SQL database. In my example I had Microsoft SQL and HammerDB server created on AWS EC2 instances. But from HammerDB perspective it doesn’t matter as far as it can communicate to database instance.
We will follow 5 simple steps to run synthetic workload on MS SQL database. So let’s get started.
Step 1 – Installing the HammerDB Application
Before you get started make sure that –
- HammerDB and MS SQL server are on same network/VLAN
- MS SQL server is installed and running
- Login to MS SQL console and create new SQL database. Make sure that new database is created on the target storage disks. If you create database in C drive, then you might not get expected performance due to disk bottleneck.

- Download HammerDB installer (Click image below)

- Once HammerDB installer is downloaded, go ahead and install the same. Below are the links for installation steps.
At this point you should have
- MS SQL server ready with test database created on desired target storage disks
- HammerDB installed and running
Step 2 – Configuration of Schema Build
We will need to created OLTP workload schema as per TPC-C specifications. Follow below steps for building OLTP schema on target database
- Open the HammerDB console

- Under Benchmark navigation page, double-click on SQL Server. In Benchmark Options pop-up window select SQL Server and TPC-C options. Then click Ok. Click Ok once again to confirm the selection.

- Under Benchmark navigation now you can see SQL Server selected with TPC-C options.

- Expand TPC-C under SQL Server and then expand Schema Build
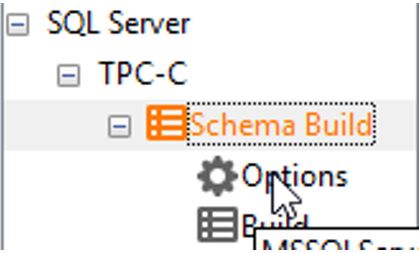
- Double-click on Options under Schema Build. Pop-up window of TPC-C Build Options will open. In this window enter below details, and then click Ok
- SQL Server – IP address or hostname of SQL server. Keep (local) if HammerDB is installed on the SQL server.
- Authentication – Use Windows Authentication if you want logged-in user credentials to be used for SQL server, else select SQL authentication and enter credentials.
- SQL Server Database – Name of the database which we had created in Step 1
- Number of Warehouses – Enter the value to number of warehouses you have chosen for your testing. Preferably select number of warehouses equal to number of cores on the server
- Virtual Users to Build Schema – Set this value equal to number of warehouses.

- In the Benchmark pane double-click on Build

- Click Yes to confirm creating schema in the target SQL database.

- HammerDB will now start creating virtual user threads and create schema in the target database. This process takes some time. You can monitor the status in top-right corner of HammerDB console. (TPC-C creation in top-right)

- Once completed you can see that the status is changed to Complete

Step 3 – Configure Driver Script
Follow below steps to configure HammerDB driver script
- Expand the Driver Script from Benchmark navigation pane and double-click on Options
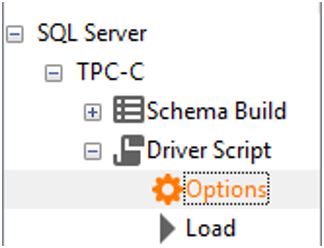
- In the TPC-C Driver Options pop-up window enter below details, and then click Ok
- SQL Server – Keep it same as Step 2
- Authentication – Keep it same as Step 2
- Total Transactions Per User – Keep default value. This value will set the number of transactions each virtual user will process before logging off
- TPC-C Driver Script – Keep this option as Timed Driver Script. This will run the workload for finite time as specified in Minutes for Test Duration
- Minutes of Rampup Time – The rampup time defines the time in minutes for the monitoring virtual user to wait for the virtual users running the workload to connect to the database. 2 minutes in my case. You can increase this number if you’ve higher number of virtual users.
- Minutes for Test Duration – The Minutes for Test Duration is shown as duration in the Driver Script. This does not include rampup time.
- Use All Warehouses – Keep this option checked.

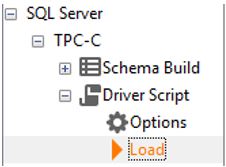
- In the Benchmark navigation double-click on Load (under Driver Script). You need to Load the Driver Script every time you make changes to Driver Script Options.
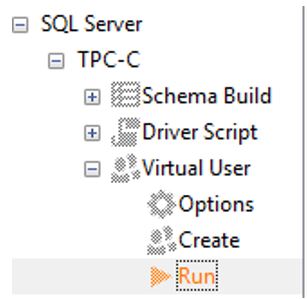
Step 4 – Create Virtual User
Once HammerDB driver script is loaded, follow below steps to create virtual user.
- Expand Virtual User from Benchmark pane

- Double-click on Options. In the pop-up window enter below details, and then click Ok.
- Virtual Users – Keep number of users same as Step 2
- Keep Other inputs as default

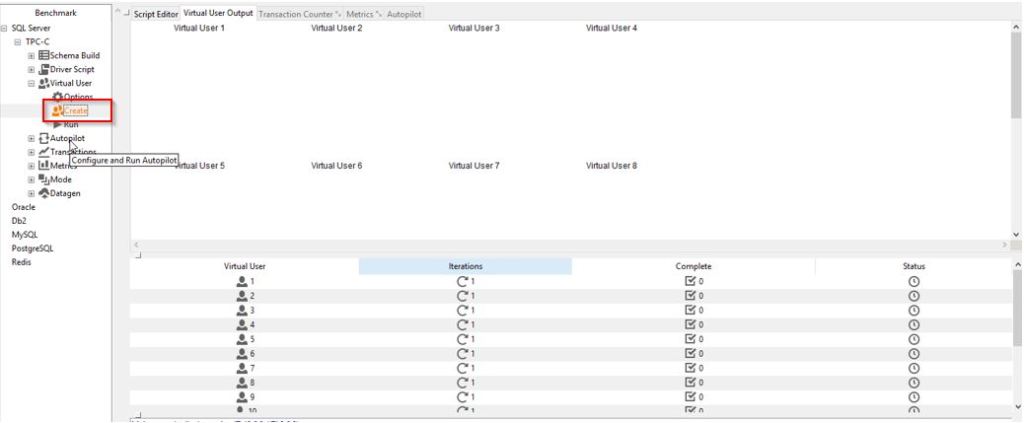
- In the Benchmark navigation pane double-click on Create under Virtual User. This will create virtual users and keep them idle.
At this point we are ready to start OLTP workload on target database.
Step 5 – Run HammerDB OLTP (TPC-C) Workload
Follow below steps to run the OLTP workload and monitor the TPMs.
- In Benchmark pane double-click on Run (Under Virtual User).
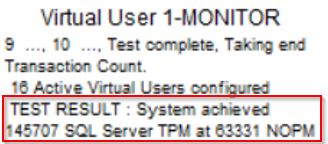
- Now Virtual Users will start logging into the target database and begin running their workload. You can monitor the status under Virtual User 1-MONITOR

- While workload is running you can monitor the real-time TPM (Transactions Per Minute) by clicking on Transaction Counter

- Once workload is completed you can see the status in top-right corner as well as under Virtual User 1-MONITOR
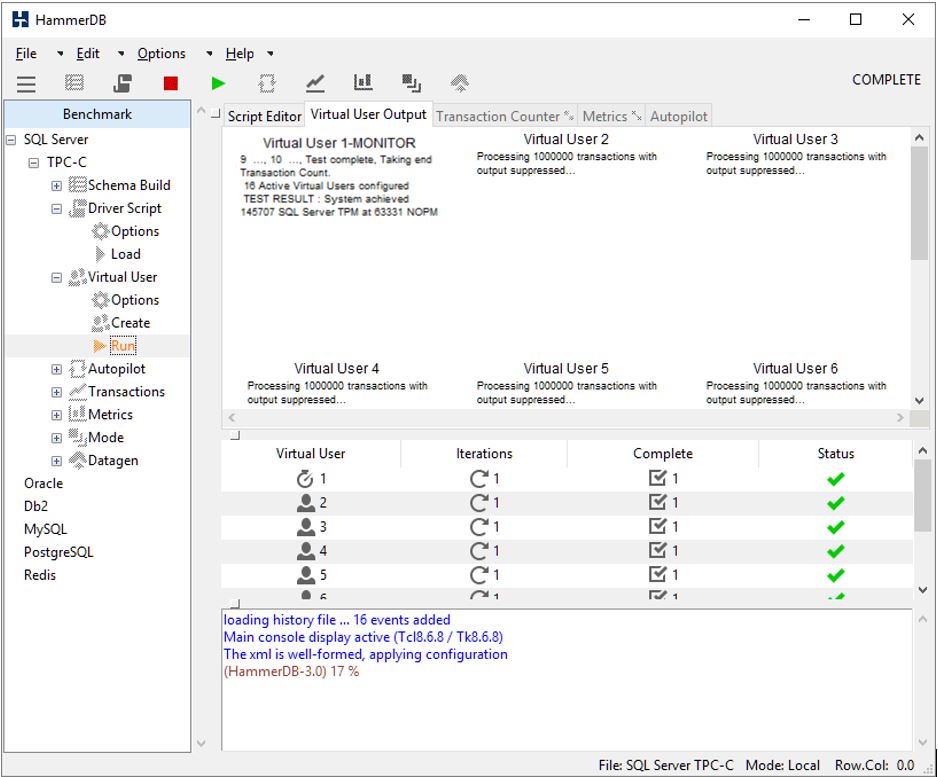
- Once the workload is completed note down TEST RESULT under Virtual User 1-MONITOR
You can run multiple tests and take average across them for realistic performance numbers.
Apart from MS SQL (used in this blog post) HammerDB supports running OLTP (TPC-C) and OLAP (TPC-H) on Oracle, IBM DB2, MySQL, PostgreSQL, MariaDB and Redis.
I hope this helps everyone.
Categories: Back To Basics, DellEMC, Performance Benchmark


1 reply »