Category: ansible

  • Automating Kubernetes deployment on VMs using Ansible

    Automating Kubernetes deployment on VMs using Ansible

    In this post, we will discuss automating Kubernetes deployment using Ansible.

    In my example, I have used CentOS VMs (on VMware) for deploying Kubernetes. But technically Kubernetes deployment steps don’t differ irrespective of the platform you use.

    Before getting started to make sure you have

    • Ansible server up and running on the network. Also, make sure Ansible can reach the VMware environment.
    • Make sure you’ve added Ansible server SSH authentication keys into VMware virtual machine before converting the same into the template. Follow this blog post for steps.

    Once you have the pre-requisites in place follow the below steps.

    Step 1 – Clone my GitHub repository which consists of required playbooks and instructions.

    [root@alb-ansible dw-pm-csi]# git clone https://github.com/waghmaredb/ansible-k8s
    Cloning into 'ansible-k8s'…
    remote: Enumerating objects: 41, done.
    remote: Counting objects: 100% (41/41), done.
    remote: Compressing objects: 100% (40/40), done.
    remote: Total 41 (delta 12), reused 0 (delta 0), pack-reused 0
    Unpacking objects: 100% (41/41), done.
    [root@alb-ansible dw-pm-csi]# cd ansible-k8s/
    [root@alb-ansible ansible-k8s]# ls
    k8s-deployment.yml README.md

    Step 2 – Edit k8s-deployment.yml file and edit below lines from VARS

    common environment details
    #ntp_server: - Replace with your NTP server IP/hostname
    domain: "" - Replace with your DOMAIN NAME
    dns_server: - Replace with your DNS server IP/hostname
    vmware environment details
    vcenter_ip: - Replace with your vCenter server IP/hostname
    vcenter_username: - Replace with vCenter admin account username
    vcenter_password: - Replace with vCenter admin account password
    vmware_datacenter: - Replace with VMware datacenter you want to use
    vmware_cluster: - Replace with VMware cluster you want to use
    vm_network: "" - Replace with VM network you want kubernetes VMs to connect
    k8s_vm_folder: - Replace with VM folder in which you want to place kubernetes VMs
    k8s_template_name: - Replace with VMware CentOS template name
    K8S environment details
    k8s_master_ip: 192.168.172.100 - Replace IP address with kubernetes master server IP address you want to use
    k8s_network_netmask: 255.255.255.0 - Replace subnet mask with netmask of kubernetes network
    k8s_network_gateway: 192.168.172.1 - Replace gateway with kubernetes network gateway
    k8s_node1_ip: 192.168.172.101 - Repalce IP address with kubernetes node IP address
    #k8s_node2_ip: 192.168.1.102
    #k8s_node3_ip: 192.168.1.103
    #k8s_node4_ip: 192.168.1.104
    #k8s_node5_ip: 192.168.1.105
    #k8s_node6_ip: 192.168.1.106
    #k8s_node7_ip: 192.168.1.107
    #k8s_node8_ip: 192.168.1.108

    Step 3 – Edit the /etc/ansible hosts file and insert the Kubernetes environment details. Make sure IP address details are inline with your Kubernetes environment

    [kube_cluster1]
    k8s-master ansible_host=192.168.172.100 ansible_user=root
    worker1 ansible_host=192.168.172.101 ansible_user=root
    worker2 ansible_host=192.168.172.102 ansible_user=root
    worker3 ansible_host=192.168.172.103 ansible_user=root
    worker4 ansible_host=192.168.172.104 ansible_user=root
    
    [master]
    k8s-master ansible_host=192.168.172.100 ansible_user=root
    
    [worker]
    worker1 ansible_host=192.168.172.101 ansible_user=root
    worker2 ansible_host=192.168.172.102 ansible_user=root
    worker3 ansible_host=192.168.172.103 ansible_user=root
    worker4 ansible_host=192.168.172.104 ansible_user=root

    Step 4 – Run the k8s-deployment.yml playbook.

  • Ansible with DellEMC Storage: Part 4 – DellEMC PowerMax Ansible Modules

    Ansible with DellEMC Storage: Part 4 – DellEMC PowerMax Ansible Modules

    This blog is the continuation of Ansible with DellEMC storage multi-part blog. 

    • In Part 1 of this series, we discussed getting started with the installation of dependencies for the Ansible and DellEMC Ansible module, followed by Ansible installation.
    • Part 2 was about the high-level basics of Ansible to get you started quickly.
    • Part 3 was getting you through the DellEMC PowerMax Ansible module installation.

    In this 4th part, we will discuss available Ansible modules for DellEMC
    PowerMax storage. Note that this blog is based on DellEMC PowerMax Ansible Module version 1.1 (Released in Dec 2019).

    Before you get started with automating DellEMC PowerMax make sure that you’re running below software versions

    • Software Version – 5978.221.221 / 5978.444.444
    • Unisphere version –  9.0 / 9.1

    Below depicted are the available Ansible modules for DellEMC PowerMax version 1.1.

    DellEMC PowerMax Ansible Module v1.1 – List of available modules

    Before you get started it’s important to understand the purpose of each module. Some of the modules can be data disruptive. You can get more details on each function on this link.

    On a high level, you can refer to the below architecture diagram of Symmetrix family storage provisioning (applicable to PowerMax as well). This will give you heads up on different definitions and object names used in DellEMC PowerMax.

    DellEMC Symmetrix Family – Storage Provisioning

    Assuming now we have an understanding of PowerMax definitions, let’s get started on creating Ansible playbook.

    Note that the default behavior of Ansible is to use SSH for executing tasks on managed hosts, for which we make hosts file entry. Below is the example of specifying host in the hosts file.

    - hosts: webserver

    But DellEMC PowerMax Ansible module wraps the RestAPI commands of an array, hence hosts entry isn’t needed. When creating Ansible playbooks for DellEMC PowerMax we’ll need to create the playbook like the below example.

    - hosts: localhost
      connection: local
      gather_facts: no

    Now let’s talk about how to create playbook. Below is the simple ansible playbook to create storage group.

    ---
    - hosts: localhost
      connection: local
      gather_facts: no
    
      tasks:
        - name: Create Storage Group using Ansible
          dellemc_powermax_storagegroup:
            serial_no: "000111111333"
            unispherehost: "1.1.1.1"
            universion: "90"
            verifycert: false
            user: "pm_username"
            password: "my_password"
            sg_name: "mySG"
            state: 'present'

    Let’s understand tasks parameters used in above sample playbook

    • dellemc_powermax_storagegroup – ansible module used for creating storage group
    • serial_no – Serial number of PowerMax array. Replace this with your array serial
    • unispherehost – IP or hostname of PowerMax Unisphere management. Replace this with your array’s IP/hostname
    • universion – Unisphere version
    • verifiycert – Unisphere might be running on self signed certificate. You can ask ansible to ignore the certificate verification (value = false).
    • user – Unisphere username
    • password – Password for supplied username
    • sg_name – Name of the Storage Group you want to create

    Last 2 lines is where all the magic happens. Here we are asking ansible to create new SG named “mySG”.

    Note that though we have supplied credentials and PowerMax array details in the same playbook, it’s not mandatory. You can always move the variables in the separate file and using Ansible vault to make playbooks reusable (more on this in another blog).

    I hope this helps everyone to get started with automation of DellEMC PowerMax Day 1/2 tasks using Ansible. We will discuss on more sample playbooks in next blog post.

  • Ansible with DellEMC Storage: Part 3 – Installing DellEMC PowerMax Ansible Module

    Ansible with DellEMC Storage: Part 3 – Installing DellEMC PowerMax Ansible Module

    This blog is the continuation of Ansible with DellEMC storage multi-part blog. 

    In Part 1 of this series, we discussed getting started with the installation of dependencies for the Ansible and DellEMC Ansible module, followed by Ansible installation.

    In Part 2 we discussed the high-level basics of Ansible to get you started quickly.

    The purpose of earlier blogs was to get you to familiarize yourself with Ansible. In this blog, we will talk about DellEMC PowerMax Ansible module.

    First let’s get our management server ready. Make sure following pre-requisites are in place

    • PowerMax is running with Unisphere 9.0
    • Red Hat Enterprise Linux 7.5 (or equivalent). CentOS in my case
    • Ansible is installed (min version 2.6)
    • Python 2.7.12 or higher is installed
    • Python library for Unisphere (PyU4V) 3.0.0.14 is installed

    Ansible relies on Python and the Ansible for PowerMax modules rely on the PyU4V Python library. Check this link for more details on the latest PyU4V module.

    Make sure that Python and “pip” are installed. pip is a Python package manager. Install “pip” if required and then use it to install PyU4V.

    Below commands will get pip and PyU4V installed.

    # python -V
    # pip -V
    # yum install python-pip
    # pip install PyU4V

    Once the system is ready with required packages next step is to get the PowerMax module from GitHub. To get the modules run below commands.

    # git clone https://github.com/dell/ansible-powermax
    # cd dellemc_ansible
    # ls

    This folder (dellemc_ansible) contains multiple documents including “Product Guide” and “Release Notes” for the downloaded version.

    We also need to copy a few files from downloaded modules to Ansible directories. Follow below process to complete the copy operation

    # cp utils/* /usr/lib/python2.7/site-packages/ansible/module_utils/
    # mkdir /usr/lib/python2.7/site-packages/ansible/modules/storage/dellemc/
    # cd /powermax/library
    # ls
    # cp * /usr/lib/python2.7/site-packages/ansible/modules/storage/dellemc/

    You’ll get an error in case of dellemc directory already exists, which you can ignore.

    At this point, we are ready with an Ansible server with DellEMC PowerMax modules installed.

    There are multiple files in the downloaded directory, each for different management tasks of DellEMC PowerMax (SRP, Volumes, Masking, etc.). We’ll discuss each module in the next blog post in this series.

  • Ansible with DellEMC Storage: Part 2 – Understanding Ansible

    Ansible with DellEMC Storage: Part 2 – Understanding Ansible

    This blog is the continuation of Ansible with DellEMC storage series. Earlier we discussed about getting started with installation of dependencies for Ansible and DellEMC Ansible module, followed by Ansible installation.

    In this blog let’s talk more around Ansible architecture and it’s concepts. So let’ get started.

    Similar to any other platform or software Ansible also has it’s own concepts which you should understand. This will help you get better hands-on with Ansible.

    Below diagram is the high level depiction of the Ansible concepts.

    Ansible Concepts

    On high level there are two types of nodes

    Managed Nodes (Right side of the diagram) – Managed nodes are the devices or software you’ll manage using Ansible. Note that managed nodes don’t need Ansible installed.

    Control/Master Node (Left side of the diagram) – This the machine Ansible is installed. On which you’ll login to run Ansible commands.

    Master node as multiple components which work together. Below are the high level details

    1. Inventory – This is the list of managed nodes which Ansible will talk to. Ansible always refers to node details from inventory file for executing any tasks. Inventory file support grouping, nesting, etc. which makes it easier for management and administration
    2. Modules – Each module defines certain Ansible function. You can execute modules using defining multiple tasks as part of playbooks
    3. Ansible Config – Consider this file as database of Ansible environment variables. Variables set in Ansible config supersedes any other setting configured in Ansible. Usually default configurations in this file are enough for many environments but there will be situations where you need to edit this file (/etc/ansible/ansible.cfg).
    4. Playbooks – Consider playbooks as list of many tasks which Ansible will execute in the sequence. Playbooks are written in YAML (.yml) and hence they are very easy to create and manage without the extensive knowledge of the coding.

    To simplify the playbook understanding just remember that

    • Playbooks contains Plays
      • Plays contains Tasks
        • Tasks call Modules

    Below is the example of Ansible Playbook

    sample Ansible playbook

    There are more concepts when it comes to Ansible (like Tower, Vault, Variables, etc.) but in my personal experience this is the good starting point.

    If you find this information stimulating enough and you want to read further then I would highly recommend that you start from here.

    I hope these bite sized blogs are helping you pickup Ansible faster. More to come 🙂

  • Ansible with DellEMC Storage: Part 1 – Installing Ansible

    Ansible with DellEMC Storage: Part 1 – Installing Ansible

    There are many blogs which cover what is Ansible and why we should care. But this multi-part blog series will cover how DellEMC and Ansible can help you automate many storage tasks.

    Ansible is being used in many organizations nowadays to manage a vast range of infrastructure, ranging from traditional configuration management to cloud resources in public clouds to physical infrastructure such as network and storage devices. There are multiple reasons why you might want to use Ansible, including – but not limited to – below examples.

    • You’re trying to have efficient DevOps environment
    • Automate Day 1/2 tasks
    • Need centralized configuration management

    Getting Started with Ansible

    Even if you’ve not installed Ansible before, it’s very easy to get started. There are many different ways to install Ansible and many dependencies will be needed based on your environment and systems you’ll be managing.

    Once your Linux machine is up and running (CentOS in my case) you can follow next steps

    Apart from Ansible itself there will be many dependencies which needs to be installed. In the case of DellEMC PowerMax storage we will need

    Note that Ansible relies on Python and the Ansible for PowerMax modules relies on a the PyU4V Python library

    So let’s get started

    Check the installed Python version by running below command and make sure it’s supported version

    # python -V

    For installing PIP package on CentOS you will need to install EPEL repository, which can be done by running below command

    # sudo yum install epel-release -y

    Once EPEL is installed you can run below command to install PIP. Also check version once installed

    # sudo yum install python-pip -y
    # pip -V

    As mentioned earlier DellEMC PowerMax Ansible integration relies on a the PyU4V Python library Run below command to install PyU4V

    # pip install PyU4V

    Finally run below command to install Ansible

    # sudo yum install ansible

    At this point you have successfully installed Ansible and ready for next parts.

  • Ansible Master – Enabling SSH Key Based Authentication

    Ansible Master – Enabling SSH Key Based Authentication

    This section seems pretty straight-forward but is the must for all the Ansible deployments.

    Follow below steps to get through the password maze in Ansible environments

    Firstly we will need to generate the SSH authentication keys. This needs to be done on the server from which you want to login to other hosts. In my case it’s Ansible master server.

    Generate your key – Run the ssh-keygen command (as below). By default system will create and store the SSH key into /root/.ssh/id_rsa, which you can change. Passphrase is optional and you can leave it blank.

    Note that if you already have generated the SSH key you have option to overwrite the same, but make sure that earlier key is not used anywhere for authentication. Below example shows option to replace existing SSH keys

    [root@ansible-master ~]# ssh-keygen
    Generating public/private rsa key pair.
    Enter file in which to save the key (/root/.ssh/id_rsa):
    /root/.ssh/id_rsa already exists.
    Overwrite (y/n)? y
    Enter passphrase (empty for no passphrase):
    Enter same passphrase again:
    Your identification has been saved in /root/.ssh/id_rsa.
    Your public key has been saved in /root/.ssh/id_rsa.pub.
    The key fingerprint is:
    SHA256:D52Rvc2F7JMlbikpj7G96Ys3bSLRUz4tNmsfNP4E2Vg root@ansible-master
    The key's randomart image is:
    +---[RSA 2048]----+
    |                 |
    |           o . . |
    |          o . + E|
    |         . o B.@ |
    |        S =.+o&+.|
    |         o.BooOoo|
    |          +.o+ B.|
    |          ..+o=.o|
    |          .+=* .o|
    +----[SHA256]-----+
    

    If you want to use existing keys then you can simply read the existing key which is saved in the file. Below is the example of the reading existing public key

    [root@ansible-master ~]# cat /root/.ssh/id_rsa.pub
    ssh-rsa AAAAB3NzaC1yc2EAAAADAQABAAABAQDDoN5+wFiV3Nold4Y7KDGkvIGBqulvdDxDm3qPj7SGsHsnEZKKxbQtO2QJNDJW2tXhLLDxY7vnyQ3xiL0bXbUTkeHHANFY7yZnMH4LH1k51yAkgDdVzKYUdvVJ81qRmYaJUJnLCsKvZMFmg7/KzecuA1QU8WVDLCH02HiRsmqVPaykcR2EOKCgX7i92Q/khZycR66GvoKcVwU9LuDLlADQt9GTaFDFiXPITNayvXkWvL7bwe9arqMCJzmEpvveglJI+vLvh5793yxrszTScTuMpjvpp4Nz5Tk0NSvQqo73yiHAsFF6M7l2hnVskyj3cAOL1dzxmopC/E1qd3DrWSOX root@ansible-master
    

    Once you have generated the SSH key next step is to add the key into target system.

    For copying the SSH keys into target system simply follow below process.

    [root@ansible-master ~]# ssh-copy-id root@192.168.1.101
    /usr/bin/ssh-copy-id: INFO: Source of key(s) to be installed: "/root/.ssh/id_rsa.pub"
    The authenticity of host '192.168.1.101 (192.168.1.101)' can't be established.
    ECDSA key fingerprint is SHA256:qnOPcE09JqKALwLLaL+SqNMy2oubvhF/EevGCcK9S9A.
    ECDSA key fingerprint is MD5:4d:65:b7:e0:e8:09:41:a8:f9:4c:2d:b6:47:55:b2:09.
    Are you sure you want to continue connecting (yes/no)? yes
    /usr/bin/ssh-copy-id: INFO: attempting to log in with the new key(s), to filter out any that are already installed
    /usr/bin/ssh-copy-id: INFO: 1 key(s) remain to be installed -- if you are prompted now it is to install the new keys
    root@192.168.1.101's password:
    
    Number of key(s) added: 1
    
    Now try logging into the machine, with:   "ssh 'root@192.168.1.101'"
    and check to make sure that only the key(s) you wanted were added.
    

    You’ll notice in the command output that this process has added the key into the target system. Note that 192.168.1.101 in above example is target system in which I wanted Ansible master to login without username and password.

    Once the SSH keys are added into the target system now you can try SSH into the target system and it won’t ask for password anymore.

    [root@ansible-master ~]# ssh root@192.168.1.101
    Last login: Tue Nov 26 09:01:16 2019 from gateway
    [root@target-system ~]#
    

    Hope this saves time for many of us.

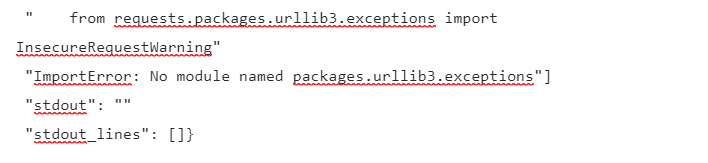
  • Fix Error – ImportError: No module named packages.urllib3.exceptions

    Fix Error – ImportError: No module named packages.urllib3.exceptions

    Recently when I was creating Python automation script I faced this weird error. This literally wasted my couple of days and needless to mentioned frustration it caused.

    Below is the error message which I was getting

    *
    fatal: [127.0.0.1]: FAILED! => {"changed": true
     "cmd": "python CreateFileSystem.py i-06a848f20bafd0475 10G"
     "delta": "0:00:00.077332"
     "end": "2019-11-21 06:58:53.018383"
     "msg": "non-zero return code"
     "rc": 1
     "start": "2019-11-21 06:58:52.941051"
     "stderr": "CreateFileSystem.py:49: SyntaxWarning: name 'unity_headers' is used prior to global declaration\n  global unity_headers\nTraceback (most recent call last):\n  File \"CreateFileSystem.py\"
     line 5
     in <module>\n    from requests.packages.urllib3.exceptions import InsecureRequestWarning\nImportError: No module named packages.urllib3.exceptions"
     "stderr_lines": ["CreateFileSystem.py:49: SyntaxWarning: name 'unity_headers' is used prior to global declaration"
     "  global unity_headers"
     "Traceback (most recent call last):"
     "  File \"CreateFileSystem.py\"
     line 5
     in <module>"
     "    from requests.packages.urllib3.exceptions import InsecureRequestWarning"
     "ImportError: No module named packages.urllib3.exceptions"]
     "stdout": ""
     "stdout_lines": []}

    As you can see from the error it keeps saying that there’s error importing “urllib3” package. But This was already installed in the system

    For resolving this I had to follow below steps.

    • Uninstall below packages
      • python-devel
      • libevent-devel
      • openssl-devel
      • libffi-devel
      • Requests (pip)
      • urllib3 (pip)
    • Install below packages
      • python-devel
      • libevent-devel
      • openssl-devel
      • libffi-devel
    • Run below command
    pip install requests urllib3

    These steps resolved the issue I was facing.

    Also, DO NOT install pip packges (requests and urllib3) individually, run them as single command. This makes sure that required pip dependencies are also auto installed. Strangely I haven’t seen dependencies getting installed when you install them one by one.

  • Installing Kubernetes on CentOS

    Installing Kubernetes on CentOS

    Part of my job is to talk about the latest geeky technologies and many times I also have to demonstrate the same – Kind of “Show me” discussions.

    When I started working on getting my hands dirty on Kubernetes (aka K8S) I faced many issues to get started. Now I am at the level where deploying K8S isn’t a big deal at all. The reason I am writing this blog is that often more than not I always get into discussions where someone is just starting with the K8S journey and has the same queries and questions which I also had. Hopefully, this summary will help people to get started with K8S.

    Before I get started it’s important to understand the K8S lingo 🙂 This will help understand the implementation steps. Also, note that the purpose of this page is not to re-iterate the K8S components and architecture. It’s purely intended to list the steps o have hassle-free K8S deployment

    Make sure that the VMware template which will be used has Ansible master server SSH keys added before you convert the VM image to the template. I have already documented this process of enabling SSH-based authentication in this blog

    Part 1 – Dependencies

    Below are the list of dependencies which needs to be installed on all the K8S nodes (master and worker)

    • Disable SELinux
    sudo setenforce 0
    sudo sed -i 's/^SELINUX=enforcing$/SELINUX=permissive/' /etc/selinux/config
    • Turnoff swap (also remove swap entry from /etc/fstab)
    swapoff -a
    yum -y install docker
    systemctl enable docker
    systemctl start docker
    systemctl status docker
    • Ensure net.bridge.bridge-nf-call-ip6tables is set to 1
    • Ensure net.bridge.bridge-nf-call-iptables is set to 1
    sudo bash -c 'cat <<EOF >  /etc/sysctl.d/k8s.conf
    net.bridge.bridge-nf-call-ip6tables = 1
    net.bridge.bridge-nf-call-iptables = 1
    EOF'
    • Add Kubernetes YUM repository
    cat <<EOF > /etc/yum.repos.d/kubernetes.repo
    [kubernetes]
    name=Kubernetes
    baseurl=https://packages.cloud.google.com/yum/repos/kubernetes-el7-x86_64
    enabled=1
    gpgcheck=1
    repo_gpgcheck=1
    gpgkey=https://packages.cloud.google.com/yum/doc/yum-key.gpg https://packages.cloud.google.com/yum/doc/rpm-package-key.gpg
    EOF
    • Install kubelet (I installed version 1.14)
    • install kubeadm (I installed version 1.14)
    • Start kubelet service
    yum -y install kubelet kubeadm

    Below listed dependencies are only for K8S master

    • Install kubectl
    yum -y install kubectl
    kubectl version

    Part 2 – Kubernetes Master

    Below listed steps are for configuring K8S Master

    • Initialize the cluster using below command
    kubeadm init --pod-network-cidr=10.244.0.0/16 >> cluster_initialized.txt
    • Create ~/.kube directory (chmod 0755)
    • Copy admin.conf to user’s kube config
    cp -i /etc/kubernetes/admin.conf $HOME/.kube/config
    • Install Pod network. In my case I have used Flannel, but you can choose relevant cluster networking from certified options from this link.
    kubectl apply -f https://raw.githubusercontent.com/coreos/flannel/a70459be0084506e4ec919aa1c114638878db11b/Documentation/kube-flannel.yml >> pod_network_setup.txt

    At this moment your K8S master is installed and configured. Next step is to configure worker nodes and add them into the K8S cluster

    Part 3 – Kubernetes Worker

    Final part is to have worker nodes configured and add them in K8S cluster. This steps involves running commands on Master and Worker nodes.

    • Master node – For adding worker nodes into the K8S cluster we first need to get the join command from the master server. Run the below command on Master server
    kubeadm token create --print-join-command
    • Note/copy the join command output. We need to run this join command on all worker nodes.

    Finally run below command on the K8S Master. If everything was successful then you should see list of all the nodes (Master and Worker) of your K8S cluster.

    kubectl get nodes

    This concludes K8S installation and configuration 🙂