Tag: automation

  • Automating Kubernetes deployment on VMs using Ansible

    Automating Kubernetes deployment on VMs using Ansible

    In this post, we will discuss automating Kubernetes deployment using Ansible.

    In my example, I have used CentOS VMs (on VMware) for deploying Kubernetes. But technically Kubernetes deployment steps don’t differ irrespective of the platform you use.

    Before getting started to make sure you have

    • Ansible server up and running on the network. Also, make sure Ansible can reach the VMware environment.
    • Make sure you’ve added Ansible server SSH authentication keys into VMware virtual machine before converting the same into the template. Follow this blog post for steps.

    Once you have the pre-requisites in place follow the below steps.

    Step 1 – Clone my GitHub repository which consists of required playbooks and instructions.

    [root@alb-ansible dw-pm-csi]# git clone https://github.com/waghmaredb/ansible-k8s
    Cloning into 'ansible-k8s'…
    remote: Enumerating objects: 41, done.
    remote: Counting objects: 100% (41/41), done.
    remote: Compressing objects: 100% (40/40), done.
    remote: Total 41 (delta 12), reused 0 (delta 0), pack-reused 0
    Unpacking objects: 100% (41/41), done.
    [root@alb-ansible dw-pm-csi]# cd ansible-k8s/
    [root@alb-ansible ansible-k8s]# ls
    k8s-deployment.yml README.md

    Step 2 – Edit k8s-deployment.yml file and edit below lines from VARS

    common environment details
    #ntp_server: - Replace with your NTP server IP/hostname
    domain: "" - Replace with your DOMAIN NAME
    dns_server: - Replace with your DNS server IP/hostname
    vmware environment details
    vcenter_ip: - Replace with your vCenter server IP/hostname
    vcenter_username: - Replace with vCenter admin account username
    vcenter_password: - Replace with vCenter admin account password
    vmware_datacenter: - Replace with VMware datacenter you want to use
    vmware_cluster: - Replace with VMware cluster you want to use
    vm_network: "" - Replace with VM network you want kubernetes VMs to connect
    k8s_vm_folder: - Replace with VM folder in which you want to place kubernetes VMs
    k8s_template_name: - Replace with VMware CentOS template name
    K8S environment details
    k8s_master_ip: 192.168.172.100 - Replace IP address with kubernetes master server IP address you want to use
    k8s_network_netmask: 255.255.255.0 - Replace subnet mask with netmask of kubernetes network
    k8s_network_gateway: 192.168.172.1 - Replace gateway with kubernetes network gateway
    k8s_node1_ip: 192.168.172.101 - Repalce IP address with kubernetes node IP address
    #k8s_node2_ip: 192.168.1.102
    #k8s_node3_ip: 192.168.1.103
    #k8s_node4_ip: 192.168.1.104
    #k8s_node5_ip: 192.168.1.105
    #k8s_node6_ip: 192.168.1.106
    #k8s_node7_ip: 192.168.1.107
    #k8s_node8_ip: 192.168.1.108

    Step 3 – Edit the /etc/ansible hosts file and insert the Kubernetes environment details. Make sure IP address details are inline with your Kubernetes environment

    [kube_cluster1]
    k8s-master ansible_host=192.168.172.100 ansible_user=root
    worker1 ansible_host=192.168.172.101 ansible_user=root
    worker2 ansible_host=192.168.172.102 ansible_user=root
    worker3 ansible_host=192.168.172.103 ansible_user=root
    worker4 ansible_host=192.168.172.104 ansible_user=root
    
    [master]
    k8s-master ansible_host=192.168.172.100 ansible_user=root
    
    [worker]
    worker1 ansible_host=192.168.172.101 ansible_user=root
    worker2 ansible_host=192.168.172.102 ansible_user=root
    worker3 ansible_host=192.168.172.103 ansible_user=root
    worker4 ansible_host=192.168.172.104 ansible_user=root

    Step 4 – Run the k8s-deployment.yml playbook.

  • REST API and DellEMC Storage Part 3 – Unity

    REST API and DellEMC Storage Part 3 – Unity

    This blog post is 3rd part of REST API with DellEMC Storage blog series.

    • In the first part of this blog series, we discussed what is REST API and different usage options
    • Second part was about managing DellEMC PowerMax storage arrays using REST API

    In this post, we will discuss how you can use manage DellEMC Unity storage using REST API. We will be using the Postman tool during the entire blog series. So let’s get started with automating the DellEMC Unity storage system.

    The DellEMC Unity REST API Background

    DellEMC Unity is of the most user-friendly storage systems. The most common management tools for Unity systems are

    • Unisphere UI (Embedded) – An HTML5 graphical user interface used to manage Dell EMC Unity systems
    • Unisphere Command Line Interface (UEMCLI) – UEMCLI allows a user to perform tasks on the storage system by typing commands instead of using the graphical user interface

    The Dell EMC Unity includes complete REST API support, providing a developer-friendly way to manage Dell EMC Unity systems and automate various tasks.

    Dell EMC Unity’s REST API fully supports all the management tasks that a user can perform in the Unisphere GUI. Dell EMC Unity’s REST API response formats all communication in JSON notation. Users can send REST API requests using their favorite REST API tools to manage Dell EMC Unity systems in their environment. This provides flexibility in management and opens possibilities for more complex operations.

    DellEMC Unity Management Options

    Assessing DellEMC Unity’s REST API

    Once a Unity system is up and running, users can navigate to the following web addresses to get access to the REST API documentation:

    REST API Programmer’s Guide – https://{{unisphere_management_address}}/apidocs/programmers-guide/index.html

    REST API Reference Guide https://{{unisphere_management_address}}/apidocs/index.html

    DellEMC Unity’s REST API is available via Unisphere running on the array via the following Base URL.

    https://{{unisphere_management_address}}/api

    • {{unisphere_management_address}} – Replace with IP Unisphere IP address or hostname

    Supported DellEMC Unity REST API Operations

    DellEMC Unity’s REST API supports the following types of REST calls.

    • GET – Get information on objects. For example – Get Unity storage system’s details
    • POST – Create an Object. For example – Create new LUN/s
    • PUT – Making changes to an objects. For example – Change size of the existing LUN
    • DELETE – Remove an object. For example – Delete existing LUN/s

    Usually the REST client (like Postman) can be used to help figure out what REST calls you want to run.

    Building your REST API calls

    Now let’s get started with creating REST API calls. In this example we will create sample REST API call to list all the available storage pools.

    Before we get started make sure you’ve Postman installed and Unisphere is reachable.

    • Open Postman and click on New. Under new drop-down, select Request
    DellEMC Unity REST API – Postman tool GUI – 1
    • In New Request pop-up enter Request nameDescription (optional) and Name of the Collection. Then click on Save.
    DellEMC Unity REST API – Postman tool GUI – 2
    • Click on the request type drop-down and select GET.
      • Please note that we are selecting GET because is this example we are creating sample REST API call to list all the available storage pools.
      • This option will be different based on type of REST API operation
    DellEMC Unity REST API – Postman tool GUI – 3
    • Enter below Request URL
      • 1.1.1.1 – Replace with Unisphere IP address/hostname

    https://1.1.1.1/api/types/pool/instances

    DellEMC Unity REST API – Postman tool GUI – 4
    • Click on the Authorization. Enter Unisphere Username and Password.
    DellEMC Unity REST API – Postman tool GUI – 5
    • Note that Unity REST API GET request needs below 3 headers. Click on Headers and enter below header details as shown in the screenshot. Then click Send
      • Accept – application/json
      • Content-type – application/json
      • X-EMC-REST-CLIENT – true
    DellEMC Unity REST API – Postman tool GUI – 5
    • In the Postman Response section you’ll see REST API response. In this case you’ll see list of all the storage pools in Unity array.
    DellEMC Unity REST API – Postman tool GUI – 6

    Additionally please note that POST/PUT/DELETE requests need one additional Header – EMC-CSRF-TOKEN. This token is generated using GET request.

    So, let’s create one POST request for creating new LUN.

    • Follow above-listed GET request steps. Click on Headers under GET Response. Copy the EMC-CSRF-TOKEN from the Headers
    DellEMC Unity REST API – Postman tool GUI – 7
    • Now click on New and Under new drop-down, select Request (screenshot in GET request steps)
    • In New Request pop-up enter Request nameDescription (optional) and Name of the Collection. Then click on Save. (screenshot in GET request steps)
    • Click on the request type drop-down and select POST.
      • Please note that we are selecting POST because is this second example we are creating REST API call to create new LUN.
    • Click on the Authorization. Enter Unisphere Username and Password.
    • Under Params enter below details.
      • Name – Name of the LUN
      • Pool – Storage Pool in which LUN will be created
      • Size – LUN size
    DellEMC Unity REST API – Postman tool GUI – 7
    • Click on Headers and enter below header details as shown in the screenshot. Then click Send
      • Accept – application/json
      • Content-type – application/json
      • X-EMC-REST-CLIENT – true
      • EMC-CSRF-TOKEN – Copied from GET response
    DellEMC Unity REST API – Postman tool GUI – 8

    Dell EMC and REST API – Way Forward

    I hope this clarifies many basics for getting started with REST API and DellEMC Unity storage. You might also have understood that creating creating valid URLs is very important aspect of using REST API. Having this in mind we have created ready Postman collection for DellEMC Unity storage. Here’s the GitHub link to the repository. Feel free to download and share.

    Below are the additional resources available for taking REST API usage to next level.

    I hope this post will get you started with your Dell EMC Unity automation journey.

  • REST API and DellEMC Storage Part 2 – PowerMax

    REST API and DellEMC Storage Part 2 – PowerMax

    This blog post is 2nd part of REST API with DellEMC Storage blog series. In the first part of this blog series, we discussed what is REST API and different usage options. I highly encourage you to go through the first part before you get started with this post.

    In this post, we will discuss how you can use manage DellEMC PowerMax storage using REST API. We will be using the Postman tool during the entire blog series. So let’s get started with automating the DellEMC PowerMax storage system.

    The PowerMax REST API Background

    There are many different ways to manage the PowerMax storage system. You can refer to this link for more details around each. Traditionally many customers using the VMAX family systems are using the Solutions Enabler tool. This is a comprehensive tool that allows storage administrators to automate many different storage tasks using scripting (Bash, Perl, Shell scripts, etc.).

    PowerMax Unisphere GUI is HTML5 based management interface, it’s beautiful and functional and provides a web-based interactive experience for users.  Unisphere has a lot of automation baked in, and it’s intuitive wizards eliminate complexity and can often provide the right amount of automation for organizations where there isn’t a lot of change. With Unisphere version 8 everything you can do in the GUI is supported using REST API.

    DellEMC PowerMax Management Options

    Assessing DellEMC PowerMax REST API

    DellEMC PowerMax’s REST API is available via Unisphere (installed or embedded) running on the array via the following Base URL.

    https://{{unisphere_management_address}}:{{8443}}/univmax/restapi/{{version}}

    • {{unisphere_management_address}} – Replace with IP Unisphere IP address or hostname
    • {{8443}} – Default port of Unisphere. Change this as per your environment
    • {{version}} – Replace this with Unisphere version. For Unisphere version 9, replace as 90

    Supported DellEMC PowerMax REST API Operations

    Unisphere for PowerMax’s REST API supports the following types of REST calls.

    • GET – Get information on objects. For example – list all the PowerMax serial numbers managed using Unisphere
    • POST – Create an Object. For example – Create new LUN/s
    • PUT – Making changes to an objects. For example – Change size of the existing LUN
    • DELETE – Remove an object. For example – Delete existing LUN/s

    Usually the REST client (like Postman) can be used to help figure out what REST calls you want to run.

    Building your REST API calls

    Now let’s get started with creating REST API calls. In this example we will create sample REST API call to list all the available SRPs.

    Before we get started make sure you’ve Postman installed and Unisphere is reachable.

    • Open Postman and click on New. Under new drop-down, select Request
    DellEMC PowerMax REST API – Postman tool GUI – 1
    • In New Request pop-up enter Request name, Description (optional) and Name of the Collection. Then click on Save.
    DellEMC PowerMax REST API – Postman tool GUI – 2
    • Click on the request type drop-down and select GET.
      • Please note that we are selecting GET because is this example we are creating sample REST API call to list all the available SRPs.
      • This option will be different based on type of REST API operation
    DellEMC PowerMax REST API – Postman tool GUI – 3
    • Enter below Request URL
      • 1.1.1.1 – Replace with Unisphere IP address/hostname
      • 000123456789 – Replace with Serial number of PowerMax array

    https://1.1.1.1:8443/univmax/restapi/90/sloprovisioning/symmetrix/000123456789/srp

    DellEMC PowerMax REST API – Postman tool GUI – 4
    • Click on the Authorization. Enter Unisphere Username and Password. Then click Send
    DellEMC PowerMax REST API – Postman tool GUI – 5
    • In the Postman Response section you’ll see REST API response. In this case you’ll see list of all the SRPs in PowerMax array.
    DellEMC PowerMax REST API – Postman tool GUI – 6

    Dell EMC and REST API – Way Forward

    I hope this clarifies many basics for getting started with REST API and DellEMC storage. You might also have understood that creating creating valid URLs is very important aspect of using REST API. Having this in mind we have created ready Postman collection for DellEMC PowerMax storage. Here’s the GitHub link to the repository. Feel free to download and share.

    Below are the additional resources available for taking REST API usage to next level.

    1. REST API client for Unisphere – This is simple GUI tool which allows you to to construct REST API calls. Best part of this tool is having a tree view of all resources on the Unisphere to which the users can navigate through to select the desired REST call.
    2. DellEMC PowerMax REST API Concepts and Programmer’s Guide – This link has REST API document for Dell EMC PowerMax array.

    I hope this post will get you started with your Dell EMC PowerMax automation journey.

    Follow my blog with Bloglovin

  • REST API and DellEMC Storage Part 1 – Introduction

    REST API and DellEMC Storage Part 1 – Introduction

    This post is the first post of multi-part blog series to understand and use RestAPI with DellEMC XtremIO storage.

    REST API with Dell EMC

    REST stands for Representational State Transfer. REST provides access to resources (DellEMC XtremIO resources in our case) on a tree-like structure. REST uses HTTP/S for communication and replies on HTTP’s CRUD operations, which are GET, POST, PUT, DELETE. REST is stateless, which means it does not store application state information. Since REST is stateless client responses are self-documenting. For this introduction post we will talk about XtremIO, but note that each storage system has different URNs.

    REST enables each XtremIO resource (like volumes, initiator groups, etc) having its own URI (Uniform Resource Identifier). Typically REST response is received in JSON or XML format. In the case of XtremIO responses are in JSON format.

    XtremIO REST API can be accessed using the below option

    • REST Clients – Like Postman
    • CLI – Using tools like CURL
    • Programming – Using Python, Ruby, etc.

    Since XtremIO storage array is having API-first design, it allows all the operations using REST which can be done using CLI/GUI.

    Connecting to XtremIO using REST API

    XtremIO is a scale-out storage architecture and has out-of-band management server – aka XMS. You can refer to below high level diagram to check your connectivity.

    DellEMC XtremIO REST API – High Level Connectivity

    Below are the supported types of REST API with XtremIO.

    XtremIO – Supported REST API commands

    Below is the example and details of using XtremIO REST API using CURL

    # curl -k --request GET https://<user>:<pass>@1.1.1.1/api/json/v2/types
    • -k – Allow insecure SSL connection. This is needed in case you’ve self-signed certificate.
    • –request GET – This is the REST API request type.
    • https://:@1.1.1.1/api/json/v2/types – URI
      • https:// – Protocol used for REST API
      • <user>:<pass> – XtremIO XMS credentials
      • @1.1.1.1 – XtremIO XMS IP address
      • /api/json/v2/types – API Path

    In next post we will discuss on using REST API with Dell EMC storage systems

  • Databases and Integrated Copy Data Management (iCDM) with DellEMC

    Databases and Integrated Copy Data Management (iCDM) with DellEMC

    In this blog we will talk about how DellEMC can help you to store you databases smartly and efficiently.

    But firstly let’s talks about CDM and why it’s important. In the world of DBAs everyone’s always talking about performance, million IOPS and double/triple digit bandwidth with lowest possible latency. But the biggest question is whether performance is the only solution to all problems?

    For example in one of the survey members of Independent Oracle User Group (IOUG) were asked what DB activities are taking up most of the time each week?

    You can also see that performance troubleshooting is rated as second most time consuming activity, but the question is how to solve it. One of the ways people try to solve this is by upgrading their database stack. In below AWR example snippets you can see that how one of the customer has solved their performance issue by moving to DellEMC solution. Earlier they were having 92% User I/O wait time, which also means 92% of the time DB is waiting for database subsystem to respond.

    But as I have mentioned earlier upgrading the stack will always give the benefits but it does not solve all the problems. Which also means most customer apply their older process and best practices to new stack which often is the culprit of the new problems. (another blog on this later)

    But the real problem is what do you do with those databases and data? Most businesses today are trying to keep more data online. This allows them to understand the patterns and anomalies using AI/ML, which helps them taking right decisions or course correction. All this is driven using copy data, which means you need actual source production database instances to analyze, test, develop etc. Below picture is the great depiction of multiple use cases which needs source database.

    Now think of all those use cases and start thinking of the approach DBAs will take to manage the show. Usually there’s no standard way of managing this. Processes to achieve the end goal depends on the experience of the DBA and also availability of the resources.

    IDC has done some work on this problem area to understand the gravity of the situation and uncover some facts. IDC polled over 700 customers for this survey. Some of the interesting facts are –

    Tools used for producing secondary data copies

    As per the IDC survey most popular way is to rely on backup software but interestingly 53% of the respondents said that they use custom-written scripts to manage the CDM show.

    How long does it take to refresh copies?

    To which 62% of organizations, copies take ½ day or more to create (up to days). And this is very real as I have personally worked with one of my customer who used to take 2 ½ days to create single secondary copy starting weekend, on which 60 member developer team used to work.

    At which frequency are copies of dev/test or analytics refreshed?

    Copies are refreshed every few days by 32% of organizations, and weekly by 42%.

    One of the most striking detail in this IDC document is – How many Database instances do you currently have in production in your data center environment? 77% customers said that they have more that 200 database instances and 82% said that they have more than 10 copies per database.

    In simplified words this problem looks like the iceberg. People only count their production/primary database instances but secondary/re-purpose copies are usually taken for granted. If you do the quick math on IDC numbers you’ll quickly realize that this is one of the biggest operational issue in database environments.

    For Example –

    1 Production DB x 250GB DB size x 346 DB Instances = 87TB of Production data

    14 Copies of each Production DB x 250GB DB size x 346 DB Instances = 1.2PB of Copy Sprawl

    Now that we understand what copy data management issue is. Now let’s understand how DellEMC can help in simplifying the CDM problem

    Integrated Copy Data Management (iCDM)

    As per my personal experience below snippet is the best way to understand how iCDM functions. Providing self service to application/database teams with application integration. iCDM leverages advanced copy/snapshot function of the DellEMC storage system, which also means you need DellEMC storage in order to use iCDM 🙂

    To simplify things even further – in most environments you follow 3 steps process for database copy creation.

    1. Identify source database
    2. Prepare database
    3. Prepare instance

    Details for these 3 steps are as below but on high level it lacks automation, it’s (very) time consuming and most importantly it lacks automation.

    But with iCDM you can change this legacy process and adapt to something which is more modern and fits with today’s cloud native world. You can simply

    1. Install and Configure DellEMC Appsync (one time)
    2. Create and Customize workflows as per your environment
    3. Consume (repeat and scale)

    Conclusion

    DellEMC iCDM can be sumarised as

    1. Simple – Automated Copy Data Management without the need of customized scripts
    2. Intelligent – Tight integration with entire application stack – applications –> hosts –> virtualization –> DellEMC Storage with Replication
    3. Friction-less – Database and IT team are on the same page with transparent copy workflow.

    Below are the few links to the DellEMC iCDM collateral.

    Dell EMC’s integrated copy data management (iCDM) webinar

    DellEMC Appsync Datasheet

    DellEMC Appsync Software Download Link

    This blog is part of multi-blog series. Next couple of blogs I will try to explain usage of iCDM for multiple database CDM use cases.

  • Fix Error – ImportError: No module named packages.urllib3.exceptions

    Fix Error – ImportError: No module named packages.urllib3.exceptions

    Recently when I was creating Python automation script I faced this weird error. This literally wasted my couple of days and needless to mentioned frustration it caused.

    Below is the error message which I was getting

    *
    fatal: [127.0.0.1]: FAILED! => {"changed": true
     "cmd": "python CreateFileSystem.py i-06a848f20bafd0475 10G"
     "delta": "0:00:00.077332"
     "end": "2019-11-21 06:58:53.018383"
     "msg": "non-zero return code"
     "rc": 1
     "start": "2019-11-21 06:58:52.941051"
     "stderr": "CreateFileSystem.py:49: SyntaxWarning: name 'unity_headers' is used prior to global declaration\n  global unity_headers\nTraceback (most recent call last):\n  File \"CreateFileSystem.py\"
     line 5
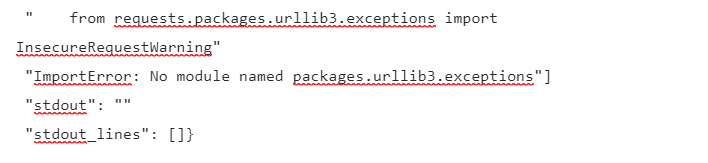
     in <module>\n    from requests.packages.urllib3.exceptions import InsecureRequestWarning\nImportError: No module named packages.urllib3.exceptions"
     "stderr_lines": ["CreateFileSystem.py:49: SyntaxWarning: name 'unity_headers' is used prior to global declaration"
     "  global unity_headers"
     "Traceback (most recent call last):"
     "  File \"CreateFileSystem.py\"
     line 5
     in <module>"
     "    from requests.packages.urllib3.exceptions import InsecureRequestWarning"
     "ImportError: No module named packages.urllib3.exceptions"]
     "stdout": ""
     "stdout_lines": []}

    As you can see from the error it keeps saying that there’s error importing “urllib3” package. But This was already installed in the system

    For resolving this I had to follow below steps.

    • Uninstall below packages
      • python-devel
      • libevent-devel
      • openssl-devel
      • libffi-devel
      • Requests (pip)
      • urllib3 (pip)
    • Install below packages
      • python-devel
      • libevent-devel
      • openssl-devel
      • libffi-devel
    • Run below command
    pip install requests urllib3

    These steps resolved the issue I was facing.

    Also, DO NOT install pip packges (requests and urllib3) individually, run them as single command. This makes sure that required pip dependencies are also auto installed. Strangely I haven’t seen dependencies getting installed when you install them one by one.